My simile for English.
Monday, May 13, 2013
Naruto Doodle
(Some people prefer different lighting. Idk lol.)
Origami Piano and Chair
Hi guys! I got in an origami mood today, so now I'm going to show you how to make a piano
and a chair with origami.
First you need 2 pieces of paper and scissors.
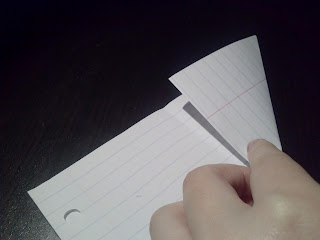
Now you need to turn the two sheets of paper into perfect squares. Please see Origami Cranes/Swans to learn how to do that. (You just fold one corner up to the edge of a sheet to make a perfect square and than cut off the excess paper.)
First well start with the piano. Step 1: Fold the paper in half.
Step 2: Fold in half again.
Step 3: Unfold once. There should be a crease down the middle now.
Step 4: Fold both sides to the middle crease.
Step 5: Unfold. Than fold the upper corners to the two creases.
Step 6: Open up the inside flaps and fold it back down so you have a triangle shape on top.
Step 7: Do step 6 to both sides.
Step 8: Take the bottom flap and fold it to the top edge.
Step 9: Fold the side quadrangles toward the middle crease.
Step 10: Now it should look like this.
Step 11: The piano can stand up now!
Step 12: Fix your piano, so the 'keys' sit forward. Ta-da! Piano!
Now let's make the chair. Start with your perfect square.
Step 1: First fold the sheet in half. On a side note, the chair will be created
very similar to the way the piano was created.
Step 2: Open up the sheet and than fold both edges to the center crease.
Step 3: Cut off one of the 1/4 pieces. You won't be needing it.
Step 4: Now fold the sheet in half. Crease it the opposite way than you folded earlier.
Step 5: Take the upper right and left hand corners. Fold them to the two creases.
Step 6: Do what you did for step 6 while creating a piano.
Step 7: But this time overlap the middle portions.
Step 8: Now fold up the middle flap to the top edge.
Step 9: Fold in the outer edges.
Step 10: It should look like this.
Step 11: Yay! Now you can stand up your chair.
Step 12: Just fold down the seat. Hazzah! A cute paper chair.
Here is another shot of your piano and chair at the end.
You can just add some piano keys for decoration and even slip
in a decorated sheet of paper to look like a sheet of music(:
Ta-da!
Sunday, May 12, 2013
Origami Crane (Swan)
Whether it's a crane or a swan, I'm going to go step by step on how to make one.
First let me show you the end product.
Alright now here is what you need to make a swan. Paper and scissors.
Subscribe to:
Comments (Atom)


